DepthAI RaspberryPi Compute Module
BW1097
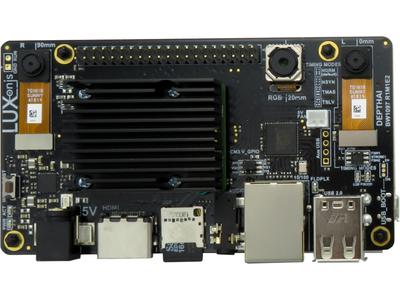
The Raspberry Pi Compute Module Edition comes with everything needed: pre-calibrated stereo cameras on-board with a 4K, 60 Hz color camera and a µSD card with Raspbian and DepthAI Python code automatically running on bootup. This allows using the power of DepthAI with literally no typing or even clicking: it just boots up doing its thing. Then you can modify the Python code with one-line changes, replacing the neural model for the objects you would like to localize.
- Built-in RaspberryPi Compute Module
- Three integrated cameras
- Complete system; everything you need is included
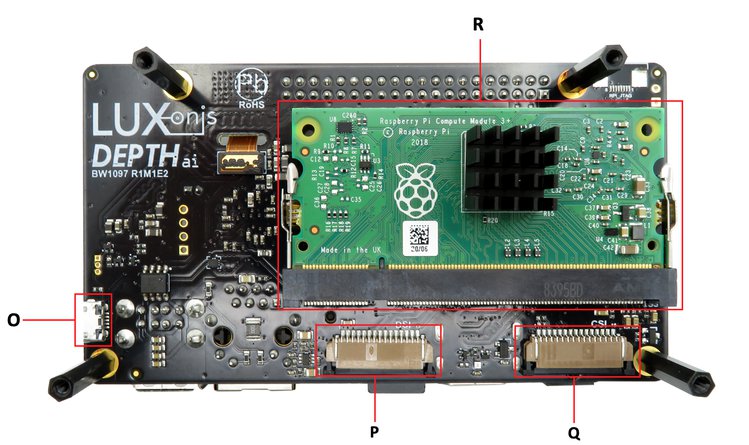
Board Layout
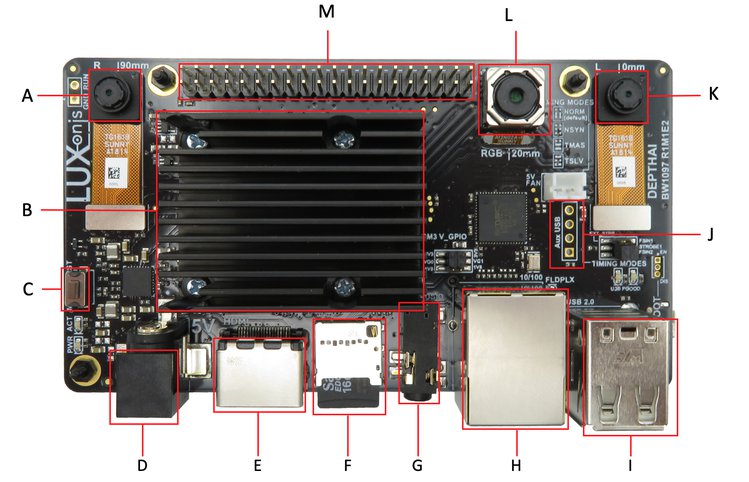
| A. 720p 120 Hz Global Shutter (Right) | J. 1x Solderable USB2.0 |
| B. DepthAI Module | K. 720p 120 Hz Global Shutter (Left) |
| C. DepthAI Reset Button | L. 4K 60 Hz Color |
| D. 5 V IN | M. RPi 40-Pin GPIO Header |
| E. HDMI | O. RPi USB-Boot |
| F. 16 GB µSD Card, Pre-configured | P. RPi Display Port |
| G. 3.5 mm Audio | Q. RPi Camera Port |
| H. Ethernet | R. Raspberry Pi Compute Module 3B+ |
| I. 2x USB2.0 |
What’s in the box?
- DepthAI RaspberryPi Compute Module Carrier Board
- Pre-flashed µSD card loaded with Raspbian 10 and DepthAI
- Default Password:
luxonis
- Default Password:
- WiFI USB dongle
- Power Supply
Setup
To get started:
Connect a display to the HDMI port.
Note that an HDMI cable is not included.
Connect a keyboard and mouse via the USB port.
Connect the power supply (included).
On boot, the Pi will run a Python test script that displays a video stream annotated with object localization metadata:
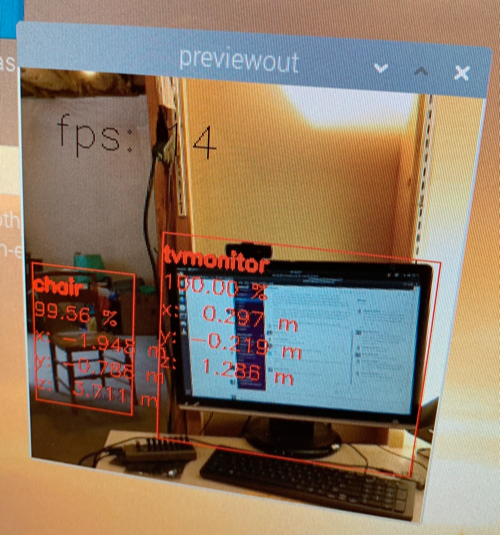
In the screenshot above, DepthAI identified a tv monitor (1.286 m from the camera) and a chair (3.711 m from the camera). See the list of object labels on GitHub.
Connect to the Internet.
Connect the Pi to the Internet to begin trying the DepthAI tutorials and examples.
Connecting to a WiFi network
To connect to a WiFi network, use the included Linux-compatible USB WiFi dongle. The Pi should recognize the dongle and display available WiFi networks in the upper right corner of the Raspbian Desktop UI.
Connecting to a network via Ethernet
The board includes an Ethernet port. Connecting an Ethernet cable to the port will enable Internet access.
Update the DepthAI API.
Upgrade your DepthAI API to the latest.
[Optional] Using your own SD-Card
If you’d like to set up DetphAI on your own (say bigger) SD-Card, there are two options:
- Download our pre-configured Raspbian image for the BW1097 (the Raspberry Pi Compute Module Edition), here: BW1097 Raspian Image Then, after downloading, update the DepthAI firmware/software (by doing a git pull on the DepthAI code base checked out on the Desktop).
- Set up your own Raspbian to your liking from say a fresh Raspbian download, and then use replace dt-blob.bin and config.txt in /boot with the following two files:
- dt-blob.bin - For enabling the Pi MIPI display
- config.txt - For enabling the 3.5mm headphone jack
 Edit on GitHub
support@luxonis.com